Weather. Materials. Scheduling. Moving. COVID. Tree removal. Finances. It seems the whole universe conspired to slow me down. The only way forward was to start multiple plates spinning and run from one to the other as some barrier lifted or shifted.
Almost exactly a year ago, at the end of June 2020, the yurt plate suddenly gained momentum.
not exactly what i envisioned
“Oh. I didn’t think…um…it’s higher than I thought it would be.”
Eric had adjusted the stakes I’d driven to provide him the general dimensions and placement for the yurt deck, and he’d built scaffolding to mark where posts and supports would go. I was standing next to the southwest scaffold, gaping up at a 6-foot corner.
“If you want it to sit lower and more level, you’ll have to excavate,” Eric explained. My heart sank. I didn’t have the money for more site excavation. The deck would have to sit high.
Looking back, I find it mildly amusing that I couldn’t see the slope for what it was: a deeply crowned clearing that drains well but equated to a much higher deck than I’d wanted. Partly, this was because the only structure I’d originally planned to have on the clearing was the yurt itself, so Sam (my excavator) crowned the spot with the idea that the deck would be in the center of the space. Erosion also played a part in changing the shape of the space, shaving soil from the sides of the clearing and deepening the crown.
My original thought would be that the deck would sit about two feet off the ground, minimizing the need for stairs and making it easier for me to age into my wild home in the woods. I’d also save a little money on railings that way, and adding onto the deck — additional yurts, to separate living and sleeping spaces — would also be easier.
But changing my plans to add a kitchen and bath building shifted the yurt placement way off to the east side of the little clearing and skewed everything. My yurt would now sit on a deck 6 feet high on one corner, tapering to 2 feet at the opposite corner, with the other two corners sort of variously splitting the difference.

In the background, on the right, the height I imagined the deck would be. In the foreground, the reality of the site’s slope. 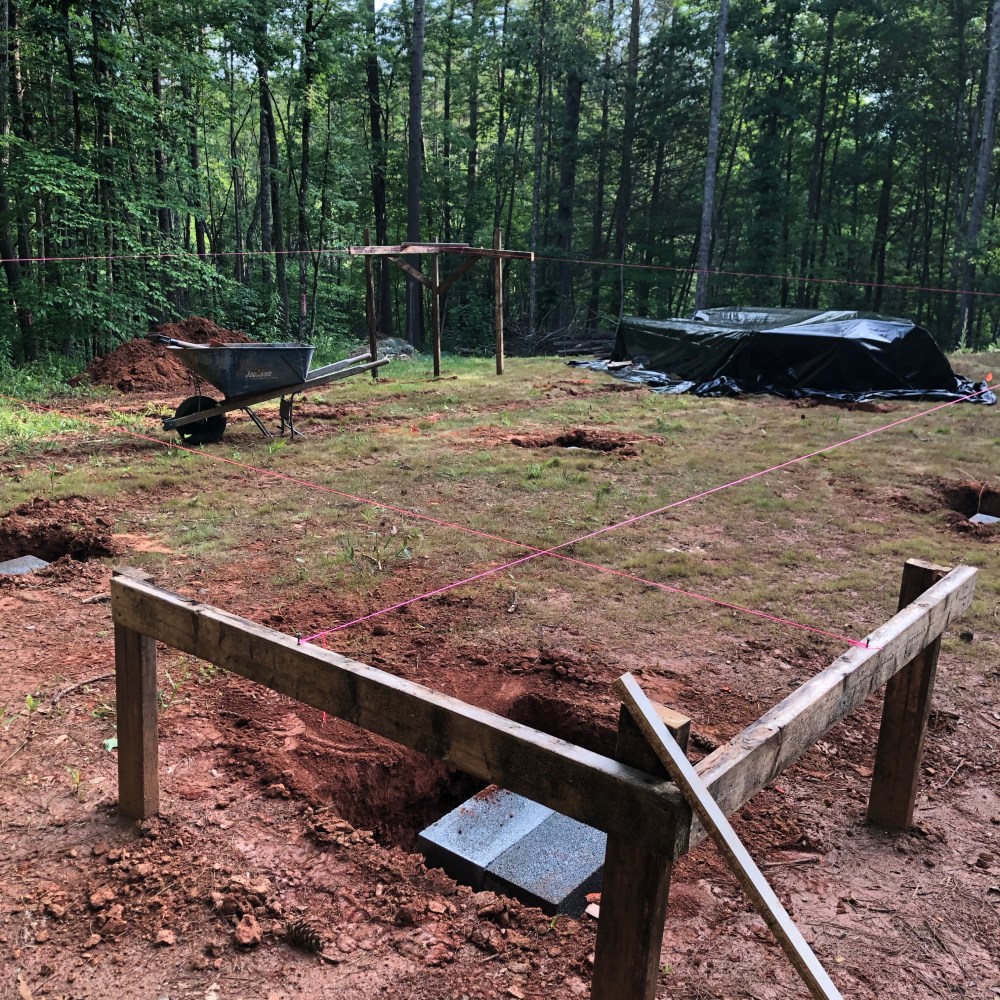
The pier holes and blocks at each corner and across the center onto which the deck supports would be built. 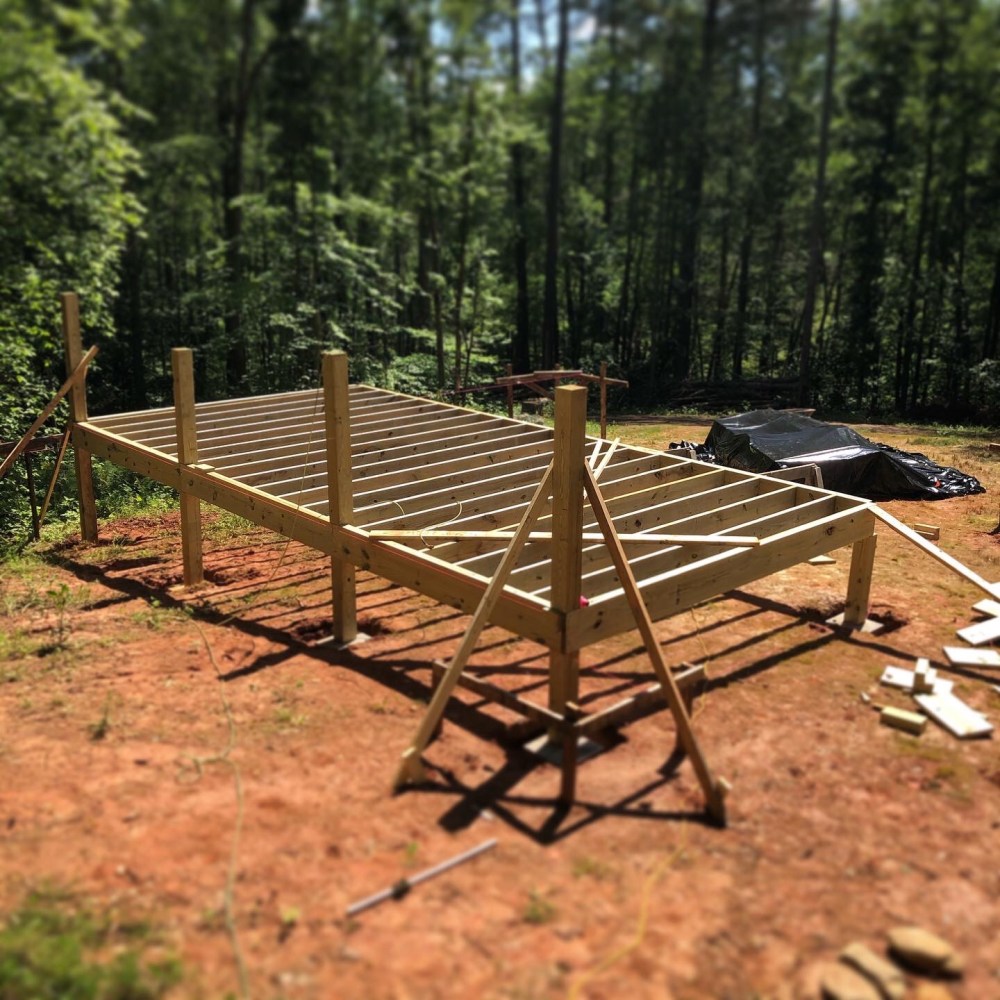
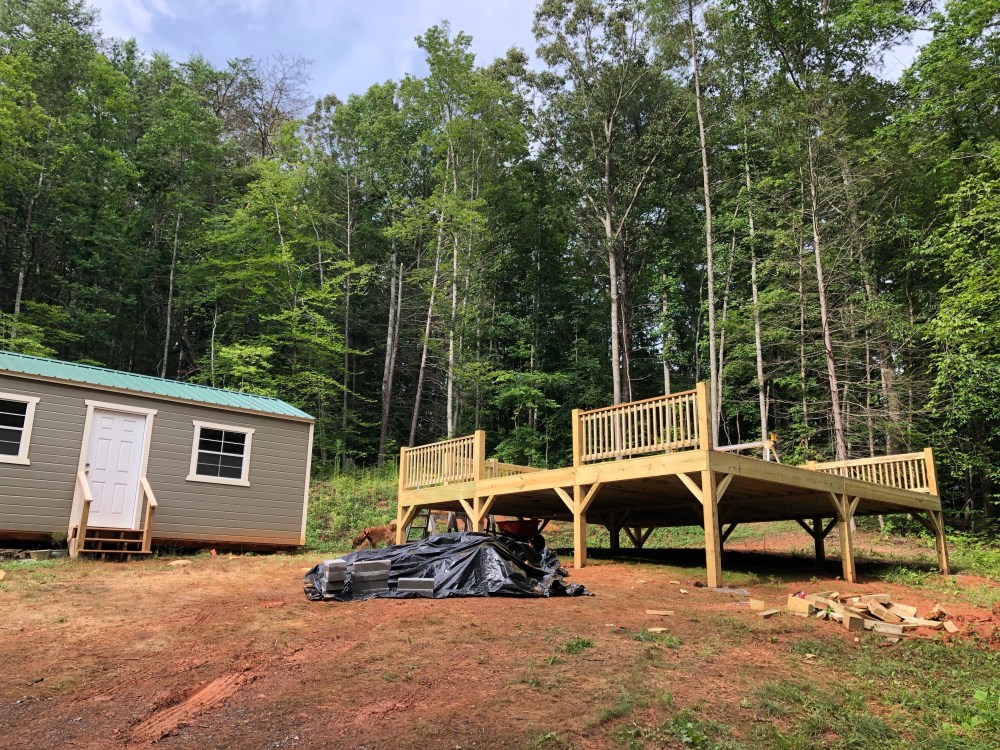
The frame was built in two, 26′ x 13′ sections, for an overall deck size of 26′ square. The yurt itself is 20′ in diameter. 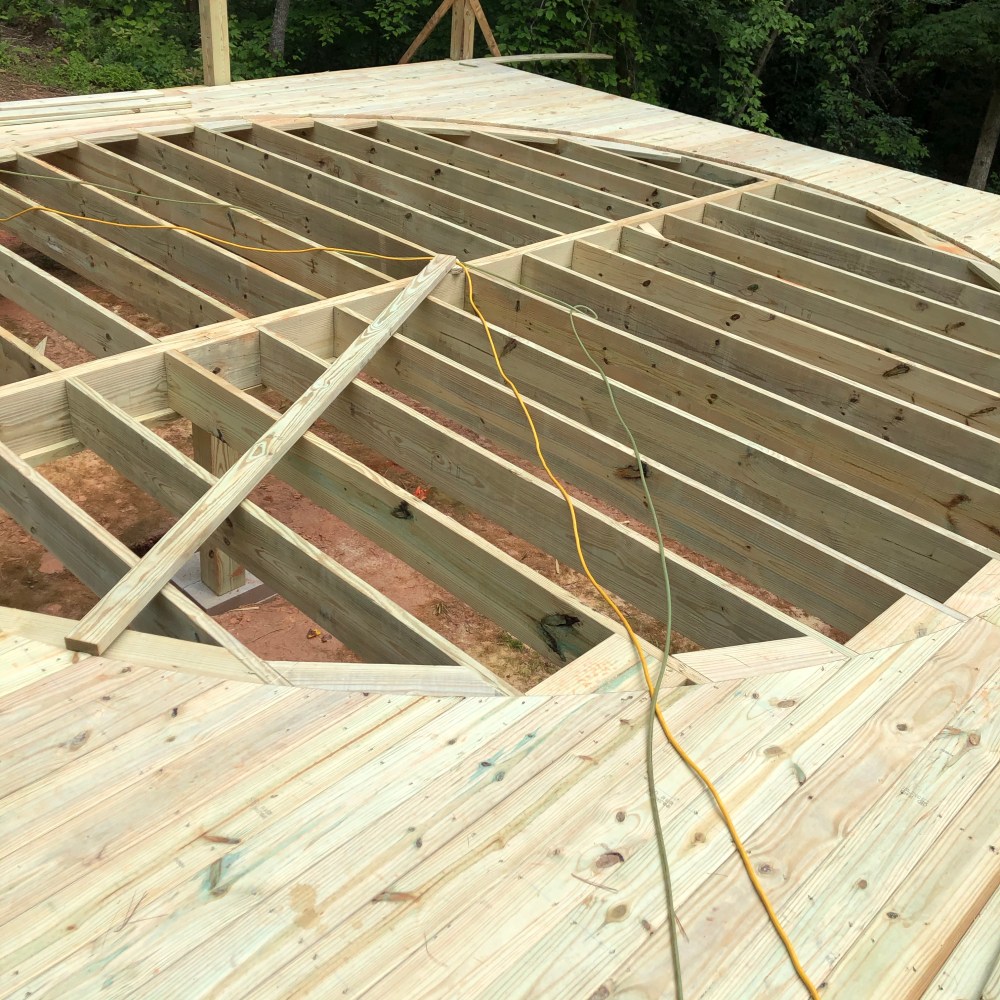
The jig Eric used to cut the center hole in the deck over which he’d build the round platform supporting the yurt. 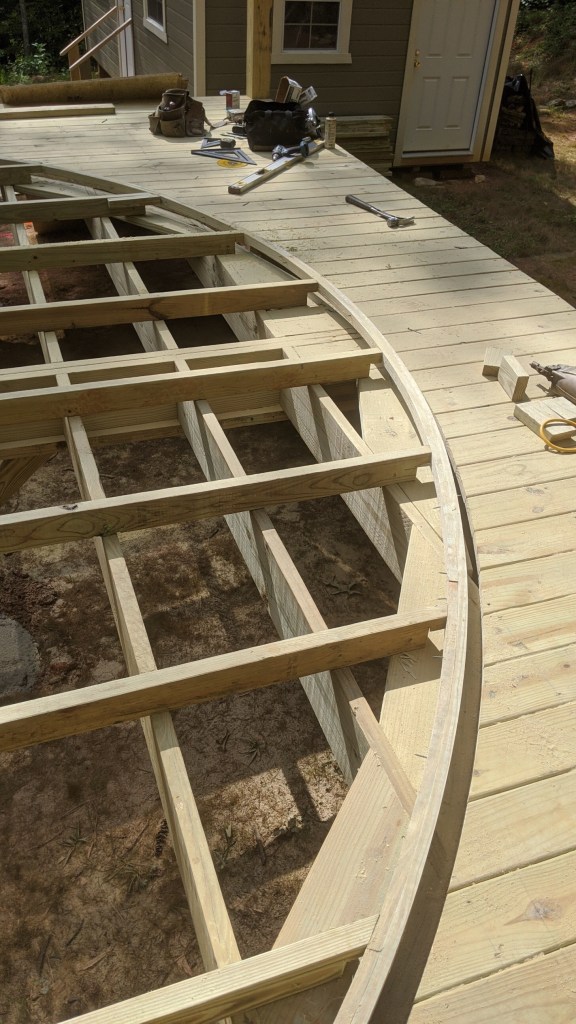
A round platform with a rim needed to be built so the sides of the yurt could be pulled down tightly and secured with cable underneath the platform for weather and pest resistance. 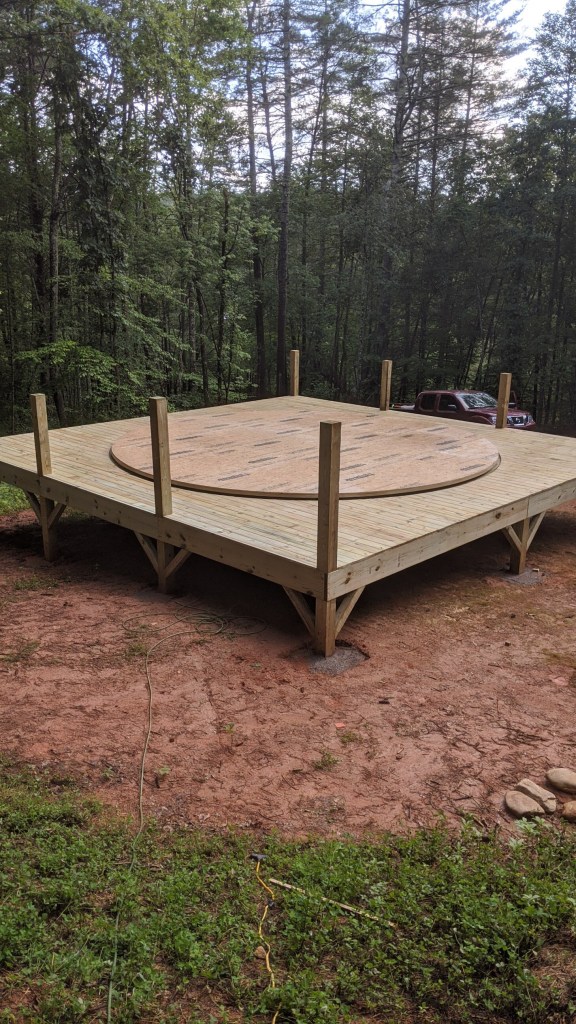
The yurt base with the round platform installed is now complete and ready for handrails. Or…is it?
resigning myself to a spectator role
My vision for building the yurt deck took another turn: I’d also wanted to take an active role in the deck build because it was important to me to participate in making my home. Admittedly, my desire stemmed from all of the YouTube videos I’d watched of young folks building their own tiny homes, step by step. I wanted my hands to shape the world I’ll live in, leave their energetic signature on every small detail. It was a romantic vision, yes. But it felt important to me.
But watching Eric work, I realized I’d only get in the way, interrupt his rhythm, and I didn’t want to frustrate or distract him. He’d asked his son and son-in-law to help, but they soon realized they, too, were in the way and spent much of the single day on the project standing around trying not to be bored.
So I took a deep breath and let Eric work in his peaceful, productive solitude — popping in only near the end of the day to congratulate him on his (startling) speed and beautiful work.
And, honestly, having someone with whom I have a relationship as a friend and neighbor work on my home was far different than contracting with a stranger. (This became especially important when the yurt went up, which I’ll talk about in a later post.)
adapting the deck design as we went
“Eric, I need you to estimate a little more work for me.”
The deck and yurt platform were finished, and Eric and I were standing on it talking about what kind of railing I wanted. I’d been staring at the spot at the very front of the deck where the main set of stairs was going to go. There was three feet from the front of the circular platform on which the yurt would sit and the edge of the deck. I imagined the abrupt transition from stairs to doorway carrying furniture in, and it prickled at me. I needed a landing to give the entryway a little breathing room, especially since the front of the deck was 4 feet higher than I’d expected it to be.
I also wanted a second set of steps off the side of the deck, leading to the side door of the kitchen building. These steps would make it easier to pop down to the outdoor cooking space I hope to put on that side of the building eventually.
With my additions estimated and a plan for the railings, Eric got back to work.
the end result: a beautiful yurt deck in the woods
Although it isn’t what I’d originally envisioned, the divergences from that vision offer unexpected benefits.
For one thing, the space below the high part of the deck can be enclosed and house things like a wheelbarrow and garden cart. If I enclose both sides, I can use the “walls” to radiate heat back onto a tender, espaliered fig tree on each side of the stairs or as a trellis for climbing beans or flowers.
Because the yurt sits higher, I can look out over the woods that slopes away to the south and enjoy a better view of the sunset right outside my front door and windows. I also have a clearer view of both doors of the kitchen building, which is nice for security.
And another security consideration: I can wrap only the outside of the deck with electric bear wire, instead of having to fence the entire clearing — at least for now — to keep curious bruins away from the soft sides of the tent.
And, you know, the deck has a kind of dramatic flair — an unexpected presence — that appeals to me as well. While nestling it down in the clearing with the kitchen building would have simplified a few things, such as access as I grow older, allowing it to stand above the clearing sets it apart.
Welcome, friend! It says. But know you are entering a sacred space. Do not take that entry lightly.
Railing sections were installed, leaving spaces for the additional landing space and two sets of stairs. 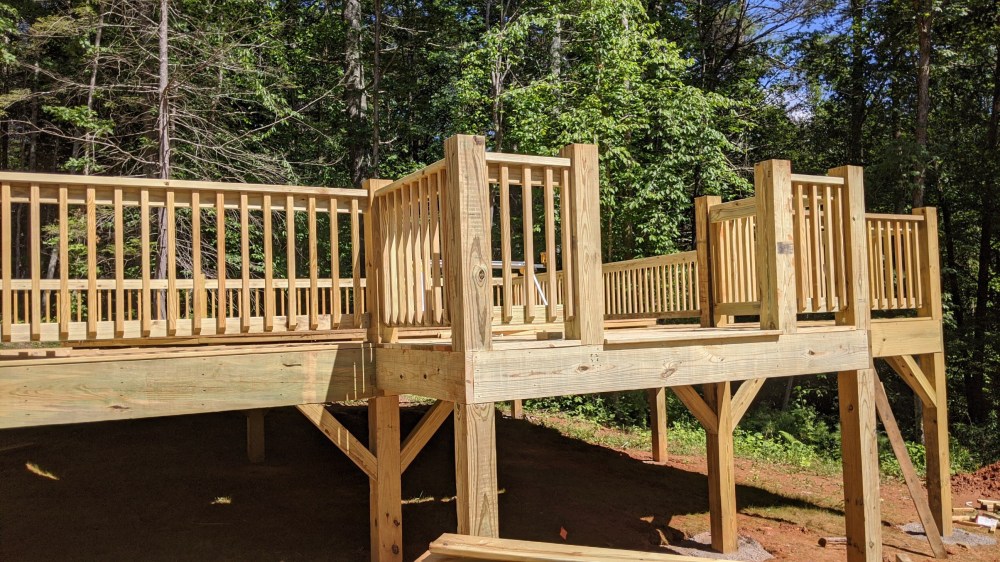
The front landing adds 4 extra feet to the front of the deck. It’s not only functional but makes an attractive entryway. 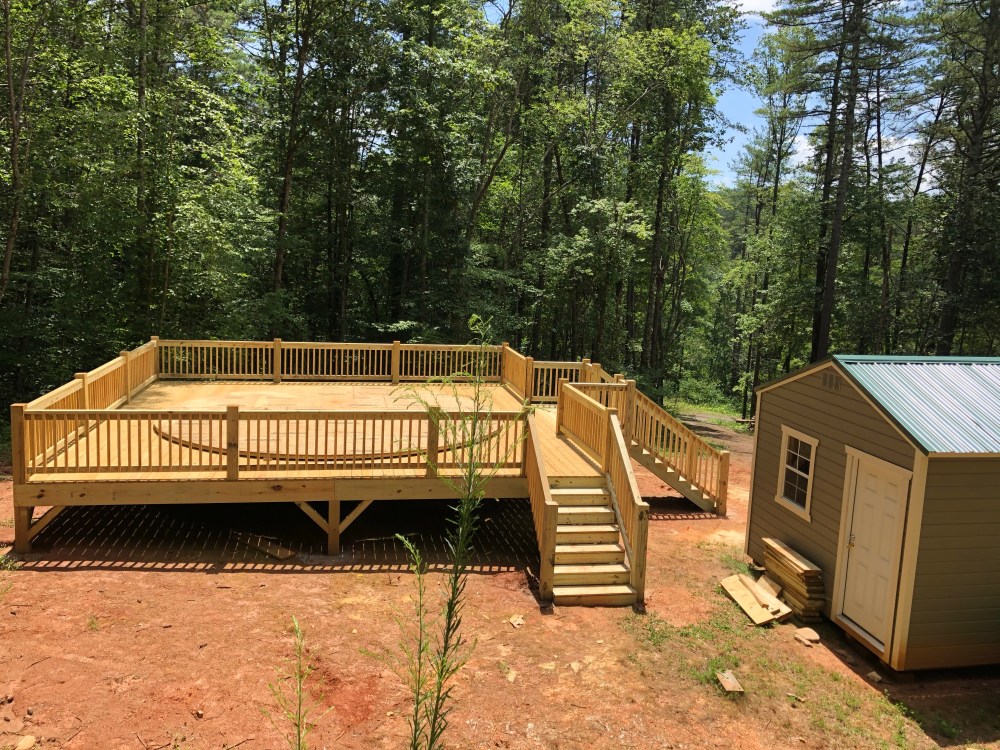
The completed deck, from up on the bank behind the barn/building. The side steps will make it easier to access the building’s side door. 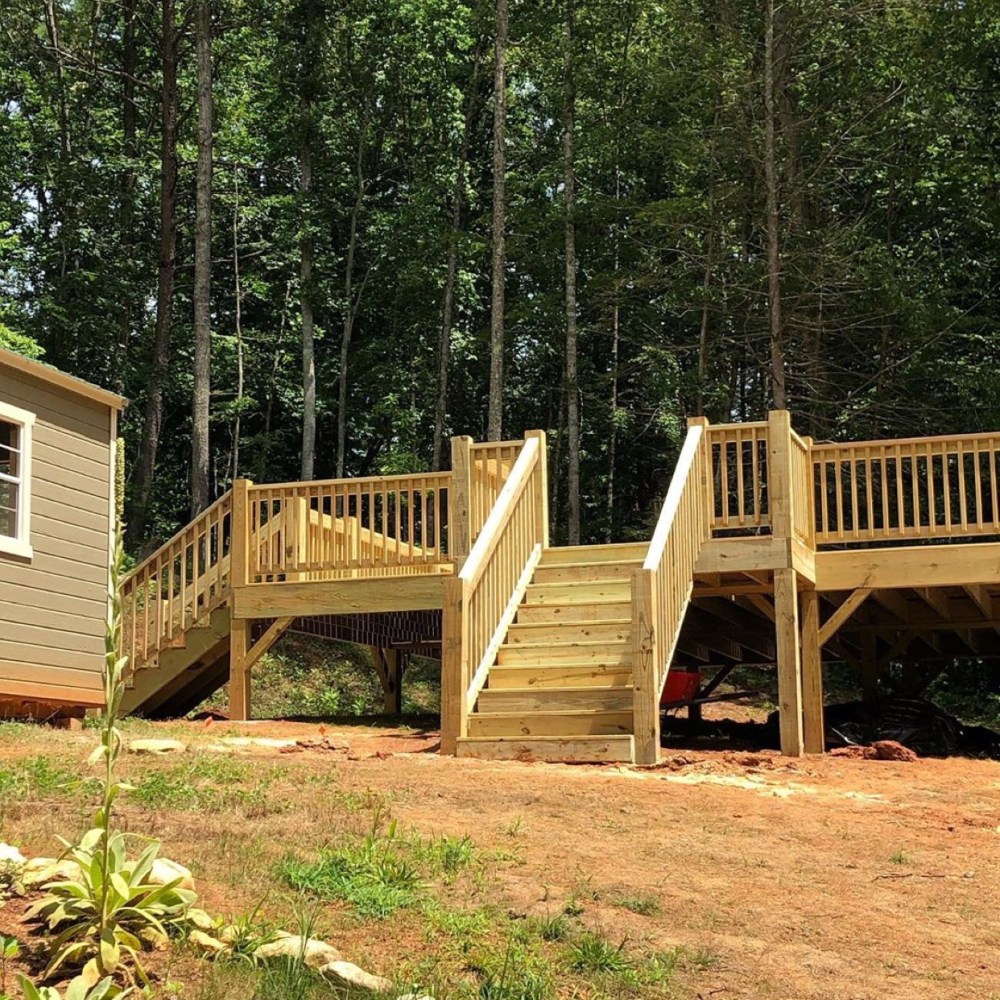
The deck’s height, at first disappointing, will provide storage space underneath on the right (south) side for things like wheelbarrows and other garden tools.

Love the progress your making….and the story that goes with it.
LikeLiked by 1 person
*you’re – sheesh!
LikeLike
😄
LikeLike
Thank you, my friend. Now, if I could just get the yurt raising video done…
LikeLike
Amazing!
LikeLike
Isn’t that cool? The really crazy thing is that he got it done in two weekends, with very minimal help!
LikeLike